Submixes in FL Studio 10

What is a submix and why would you use it?

A submix is a collection of signal flows bundled together in a way that they can be edited all at once. There are several reasons for doing this in an FL Studio environment.

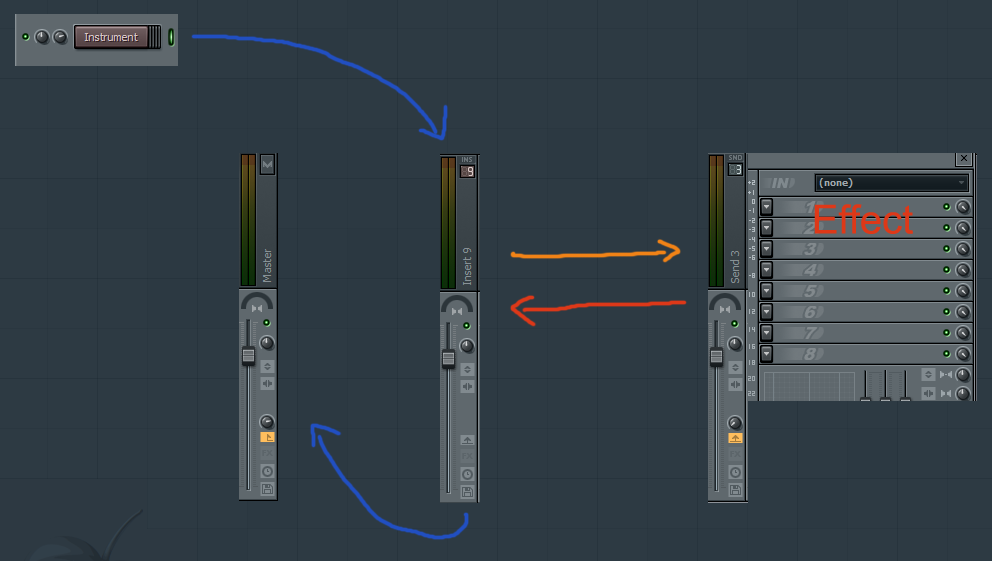
In FL any newly added instrument is routed into the master channel by default. This is usually not a good idea because you'll want to add some sort of effect on an instrument signal, this could be reverbs and delay plugins or simply an EQ, or maybe you'll just want to adjust the volume of many signals together. Most of the time you'll have a lot of instruments in your list in a production. It usually doesn't make sense to route each instrument to an individual insert in the mixer just to apply the same effects multiple times.

An example of this would be percussion instrument. If you're working on an electro house track, you're likely to have a lot of percussion samples. You can bundle these together into one submix to apply an equalizer to all of them together.

Creating a submix in FL Studio

Doing this in FL Studio is very simple.


Notice the green light to the right of the sample. Left click and drag to highlight more of the green lights in a row. You can click twice on any green light to switch the selection between one or all of the instruments. To turn off the light on specific instruments, you can right click it.

These green lights represent which instruments you have selected. Now go to the mixer and select an empty insert. Right click it and choose "link selected channels > to this track" or hit CTRL + L on your keyboard. This will route all of your instruments to your insert, creating a neat submix.


You can always add instruments to your insert by selecting them and adding them like explained. The weird thing in FL Studio is that you can't remove specific instruments from an insert in the mixer itself. However, you can simply route them to another insert if you had to remove them from your submix, then reset that insert to get everything back to default, or you can go to the channel settings of the instrument and turn off its FX number so it says "--".

You can also send multiple inserts onto another insert to create yet another layer of submixes.

When you right click an insert, you can see an option that allows you to "create submix to". If you highlight this, you'll be able to send the insert onto any other insert. If you click this, what FL will do is stop sending to the master, and instead send the signal to the insert of your choice. You can also do all of this manually by clicking the little greyed out arrows over empty inserts to turn on and off audio signal flow.


You can now arm disk recording on your final submix or route it to the master.

Mixer Sends in FL Studio 10


In FL Studio, you can make use of sends to send effects to inserts. This is used when you want to apply the same effects on multiple inserts. For example, if you have a high quality reverb effect plugin that uses a lot of CPU power it might be wise to place it on a send instead of running multiple instances of it on several inserts. Here's how it's done:

1. The difference between the insert and the send

The way an insert works is that it receives signal on one side, and outputs it on the other. Before it outputs it though, you have the possibility of using up to 8 effects slots. In FL Studio, you can set up your inserts to receive whatever inserts you like and also output to any other insert of your choice.

The send doesn't work the same way (even though it looks very much alike). The send can also hold up to 8 effects, but rather than receiving signal and outputting it somewhere else, what you should picture it doing is "applying" the effects to the inserts you set it up to. This means that you have to set up the effects differently for it to work properly. The sends often cause confusion for some people because of the way FL Studio displays them. They look just like inserts, and when you first click on them, there are no knobs to send anywhere! Well, that's because sends are passive and the way they are displayed depends on your selection in the mixer. Read on...


2. Routing an instrument to an insert

Simply add an instrument channel to your list by clicking on "Channels > Add one > FL Keys", so you have something to work with. In this case, a piano.


Click on the instrument in the channel list. The way that FL Studio works, is that by default every instrument you add will run straight into the master channel in the mixer. When you play the instrument, you will see the volume indicator on the master react. It is generally not a good idea to route instruments straight to the master because you will usually want to apply some sort of effects on your instruments.

To do this, make sure you have selected your instrument, then rightclick on an empty insert in your mixer and select "Link selected channels > To this track".


You can also simply left click on an empty insert and hit CTRL + L on your keyboard. FL will automatically rename the insert for you. Now, if you play the instrument you will see that both, the insert and the master volume indicators react. This is because the instrument now runs through the insert, and the insert outputs the signal to the master. It's like a short detour.


Nice

3. Setting up the send

Click on an empty send and rename it "Reverb Send" by middle mouse clicking it, or by pressing F2 after selecting. Now click on one of the arrows on the effects rack and choose a reverb effect. I used Fruity Reverb 2.


Due to the reason that the send is going to "apply" this reverb effect to a certain insert, you need to make sure that you lower the "dry" signal of the effect to 0. If you don't do this, the original signal will be added onto itself and you will have an unwanted increase in volume. Instead, lower the dryness completely and you're left with only the wet sound the reverb produces. You can increase that up to 100% like I did


Until now the send will not do anything to our instrument. We will now make that work.

4. Sending

In this final step, select your insert. You will see that the volume knobs on all 4 sends are turned all the way down. This means that nothing is applied onto the insert.


If you increase the volume knob on the send, you will start to hear the added effect on your instrument.


Of course, you don't have to put the knob at 100%. You can tweak it to your liking, even if the reverb effect itself is on full blast. Very useful.

If you add another instrument, and route it to another empty insert, you can apply the same send onto this as well. This way, multiple inserts can share the same effects for a consistent sounding and CPU saving approach.

From here, it's all about tweaking and getting the right sound for your production.